
Manage your Fabled subscription
Updated Jul 22, 2026
2 min read
Step 1: Open the Subscriptions page
Select your user menu from any page, then choose Subscriptions. The page header (badge 1) confirms you have landed in the right place.
Below the header you see your current plan and all available alternatives. If this is a new account, the Free tier is active by default.

Step 2: Switch between monthly and yearly billing
Click the billing interval toggle (badge 2) to switch between Monthly and Yearly.
When Yearly is selected, a discount hint appears beneath the toggle and all prices in the tier cards update in place. No action is committed at this point; you are only previewing prices.

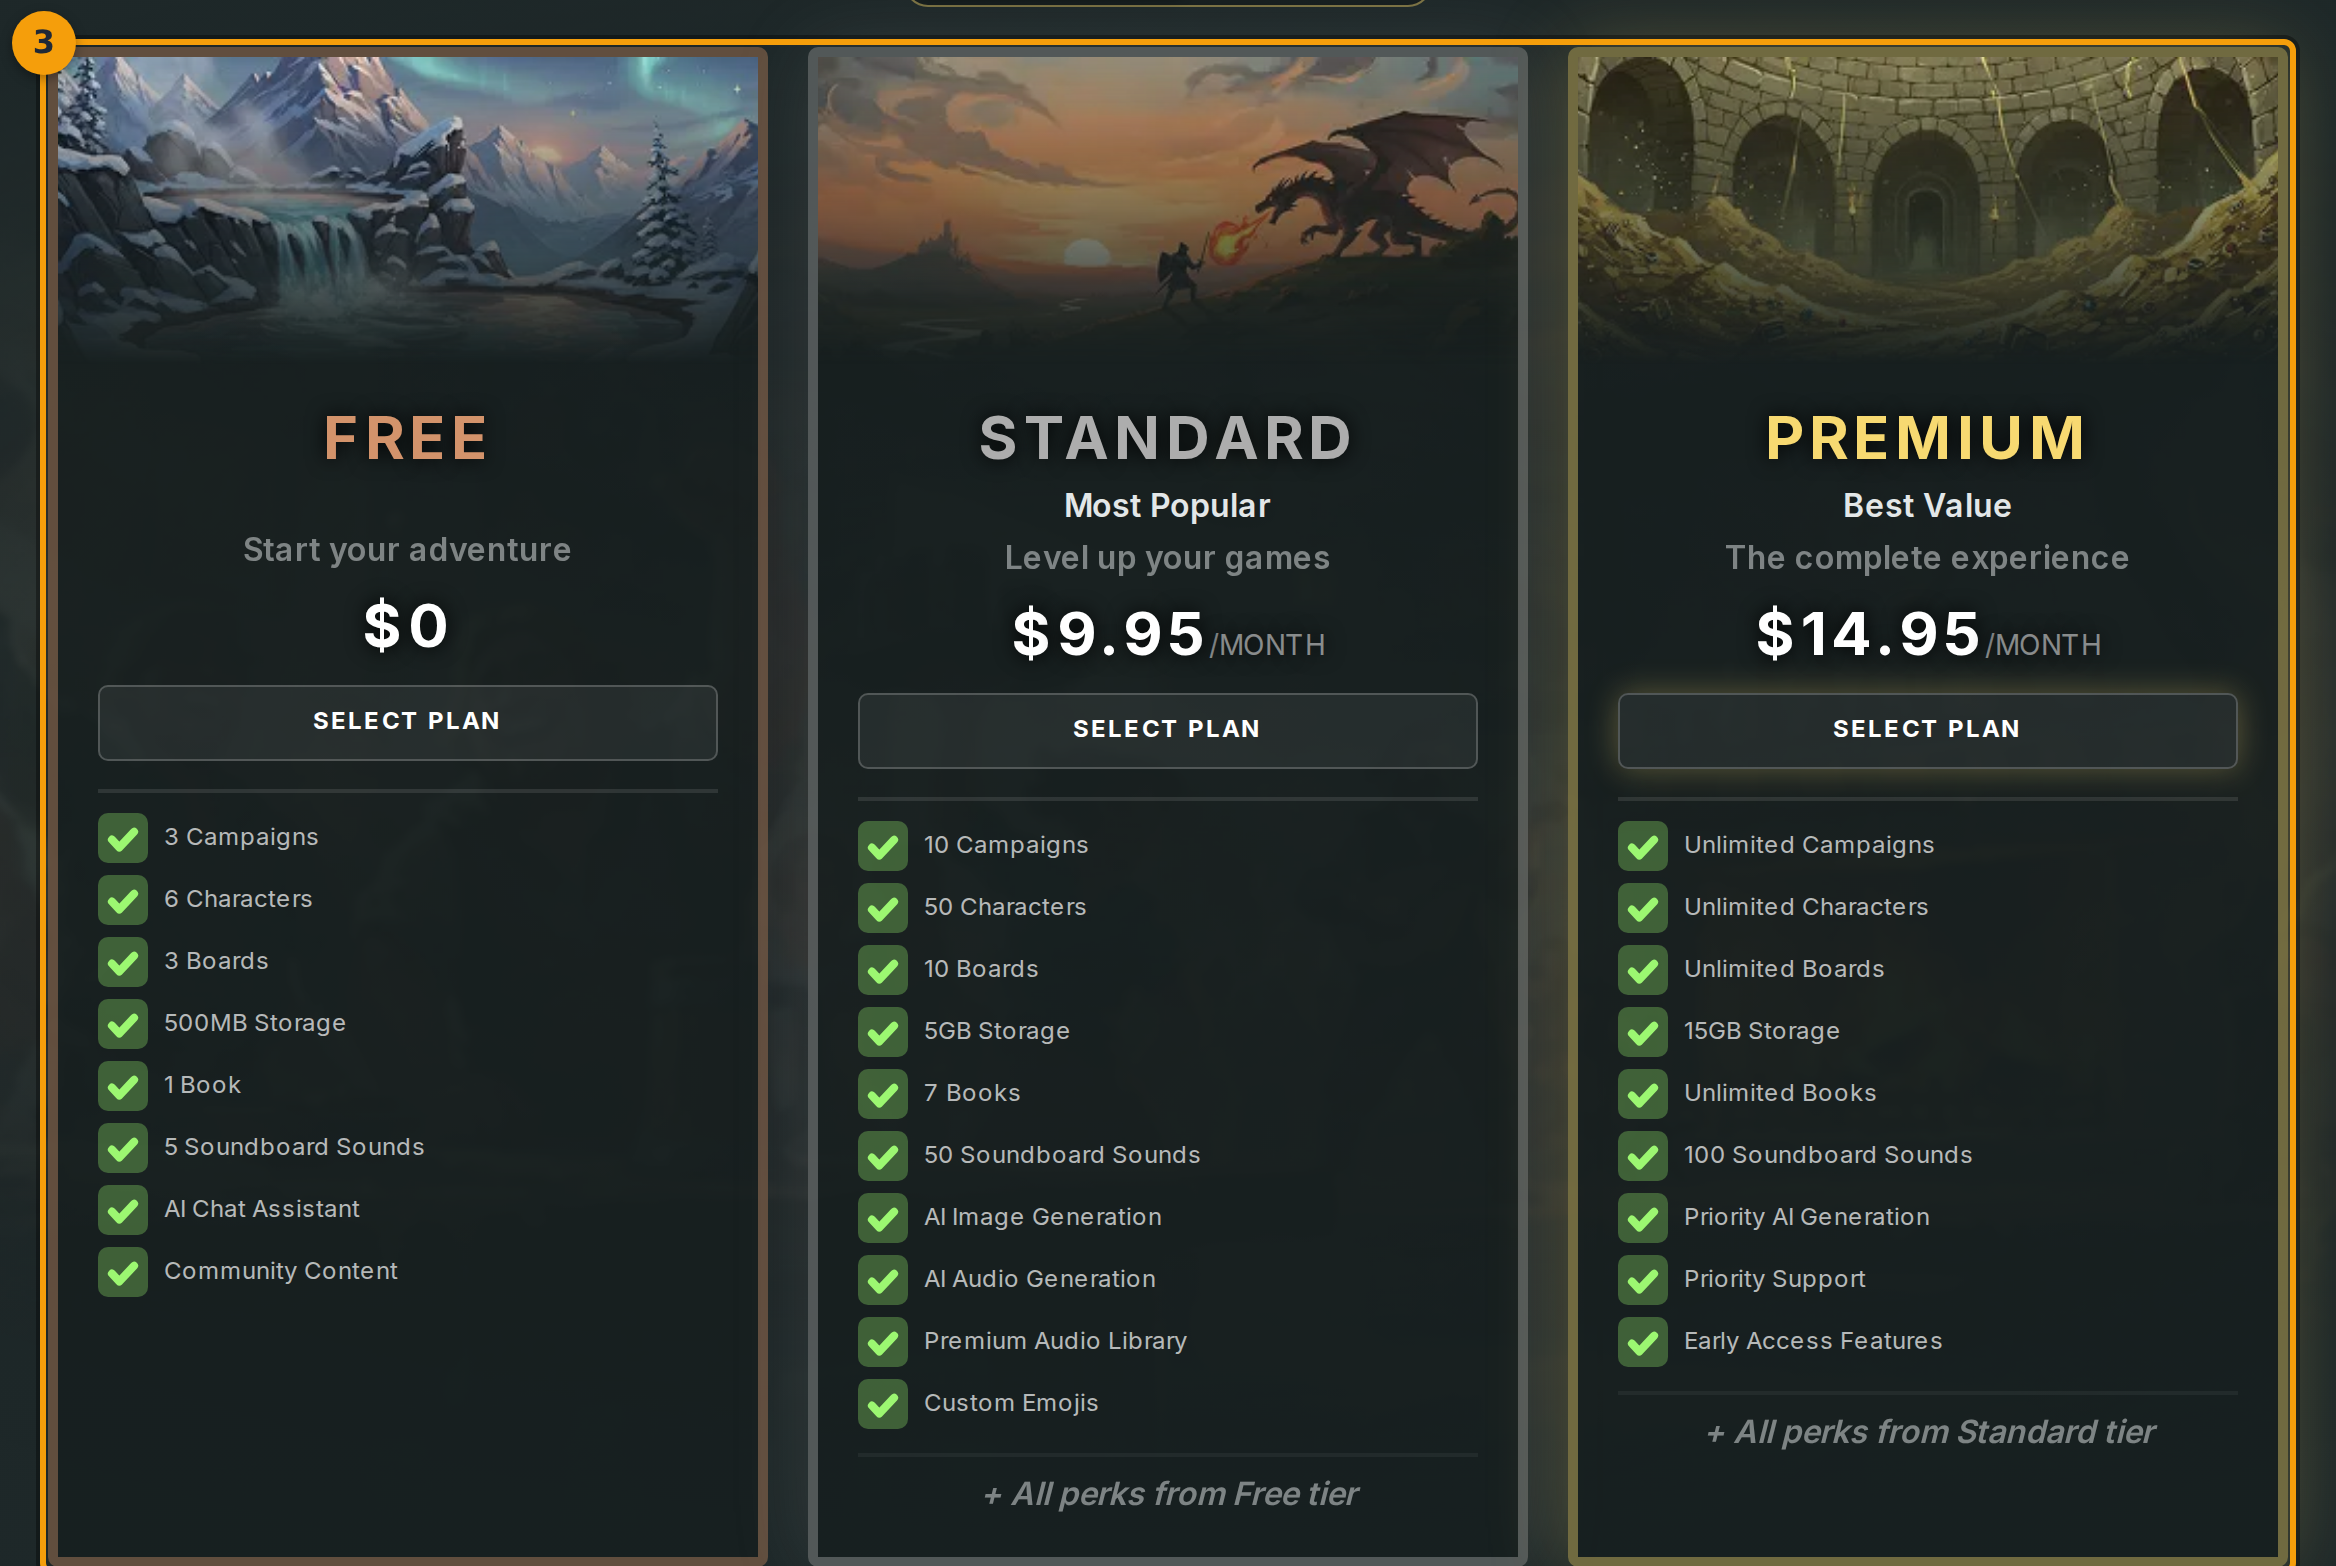
Step 3: Review your current tier and available upgrades
Find your tier in the grid (badge 3). If you are on a paid plan, that card shows a Selected badge. All other cards show an Upgrade Now button. From the Free tier, every paid card has an Upgrade Now button.
Click Upgrade Now on the tier you want to move to. Fabled opens Stripe checkout in the next step.
Step 4: Compare features in the Subscription Perks section
Scroll down to the Subscription Perks section heading (badge 4). A side-by-side table lists every plan limit and feature.
Rows cover characters, campaigns, AI generations, marketplace selling, and storage. Check this table before committing to an upgrade to confirm the tier meets your needs.
