
Compare and choose a subscription plan
Updated Jul 22, 2026
2 min read
Step 1: Open the Subscriptions page
Select your user avatar in the top-right corner of any Fabled page, then choose Subscriptions from the dropdown menu (badge 1).
The page loads with three sections: a tier hero at the top showing plan cards, marketing detail in the middle, and a feature-by-feature perks table at the bottom.

Step 2: Switch between Monthly and Yearly billing
Find the billing interval toggle near the top of the tier grid (badge 2). Click Monthly or Yearly to switch cadences.
A discount hint appears just below the toggle when Yearly is selected. The prices on every tier card update in place so you can see the exact difference.
Monthly is the lower commitment option. Yearly bills the full amount upfront but costs less overall.

Step 3: Read the tier cards and identify your current plan
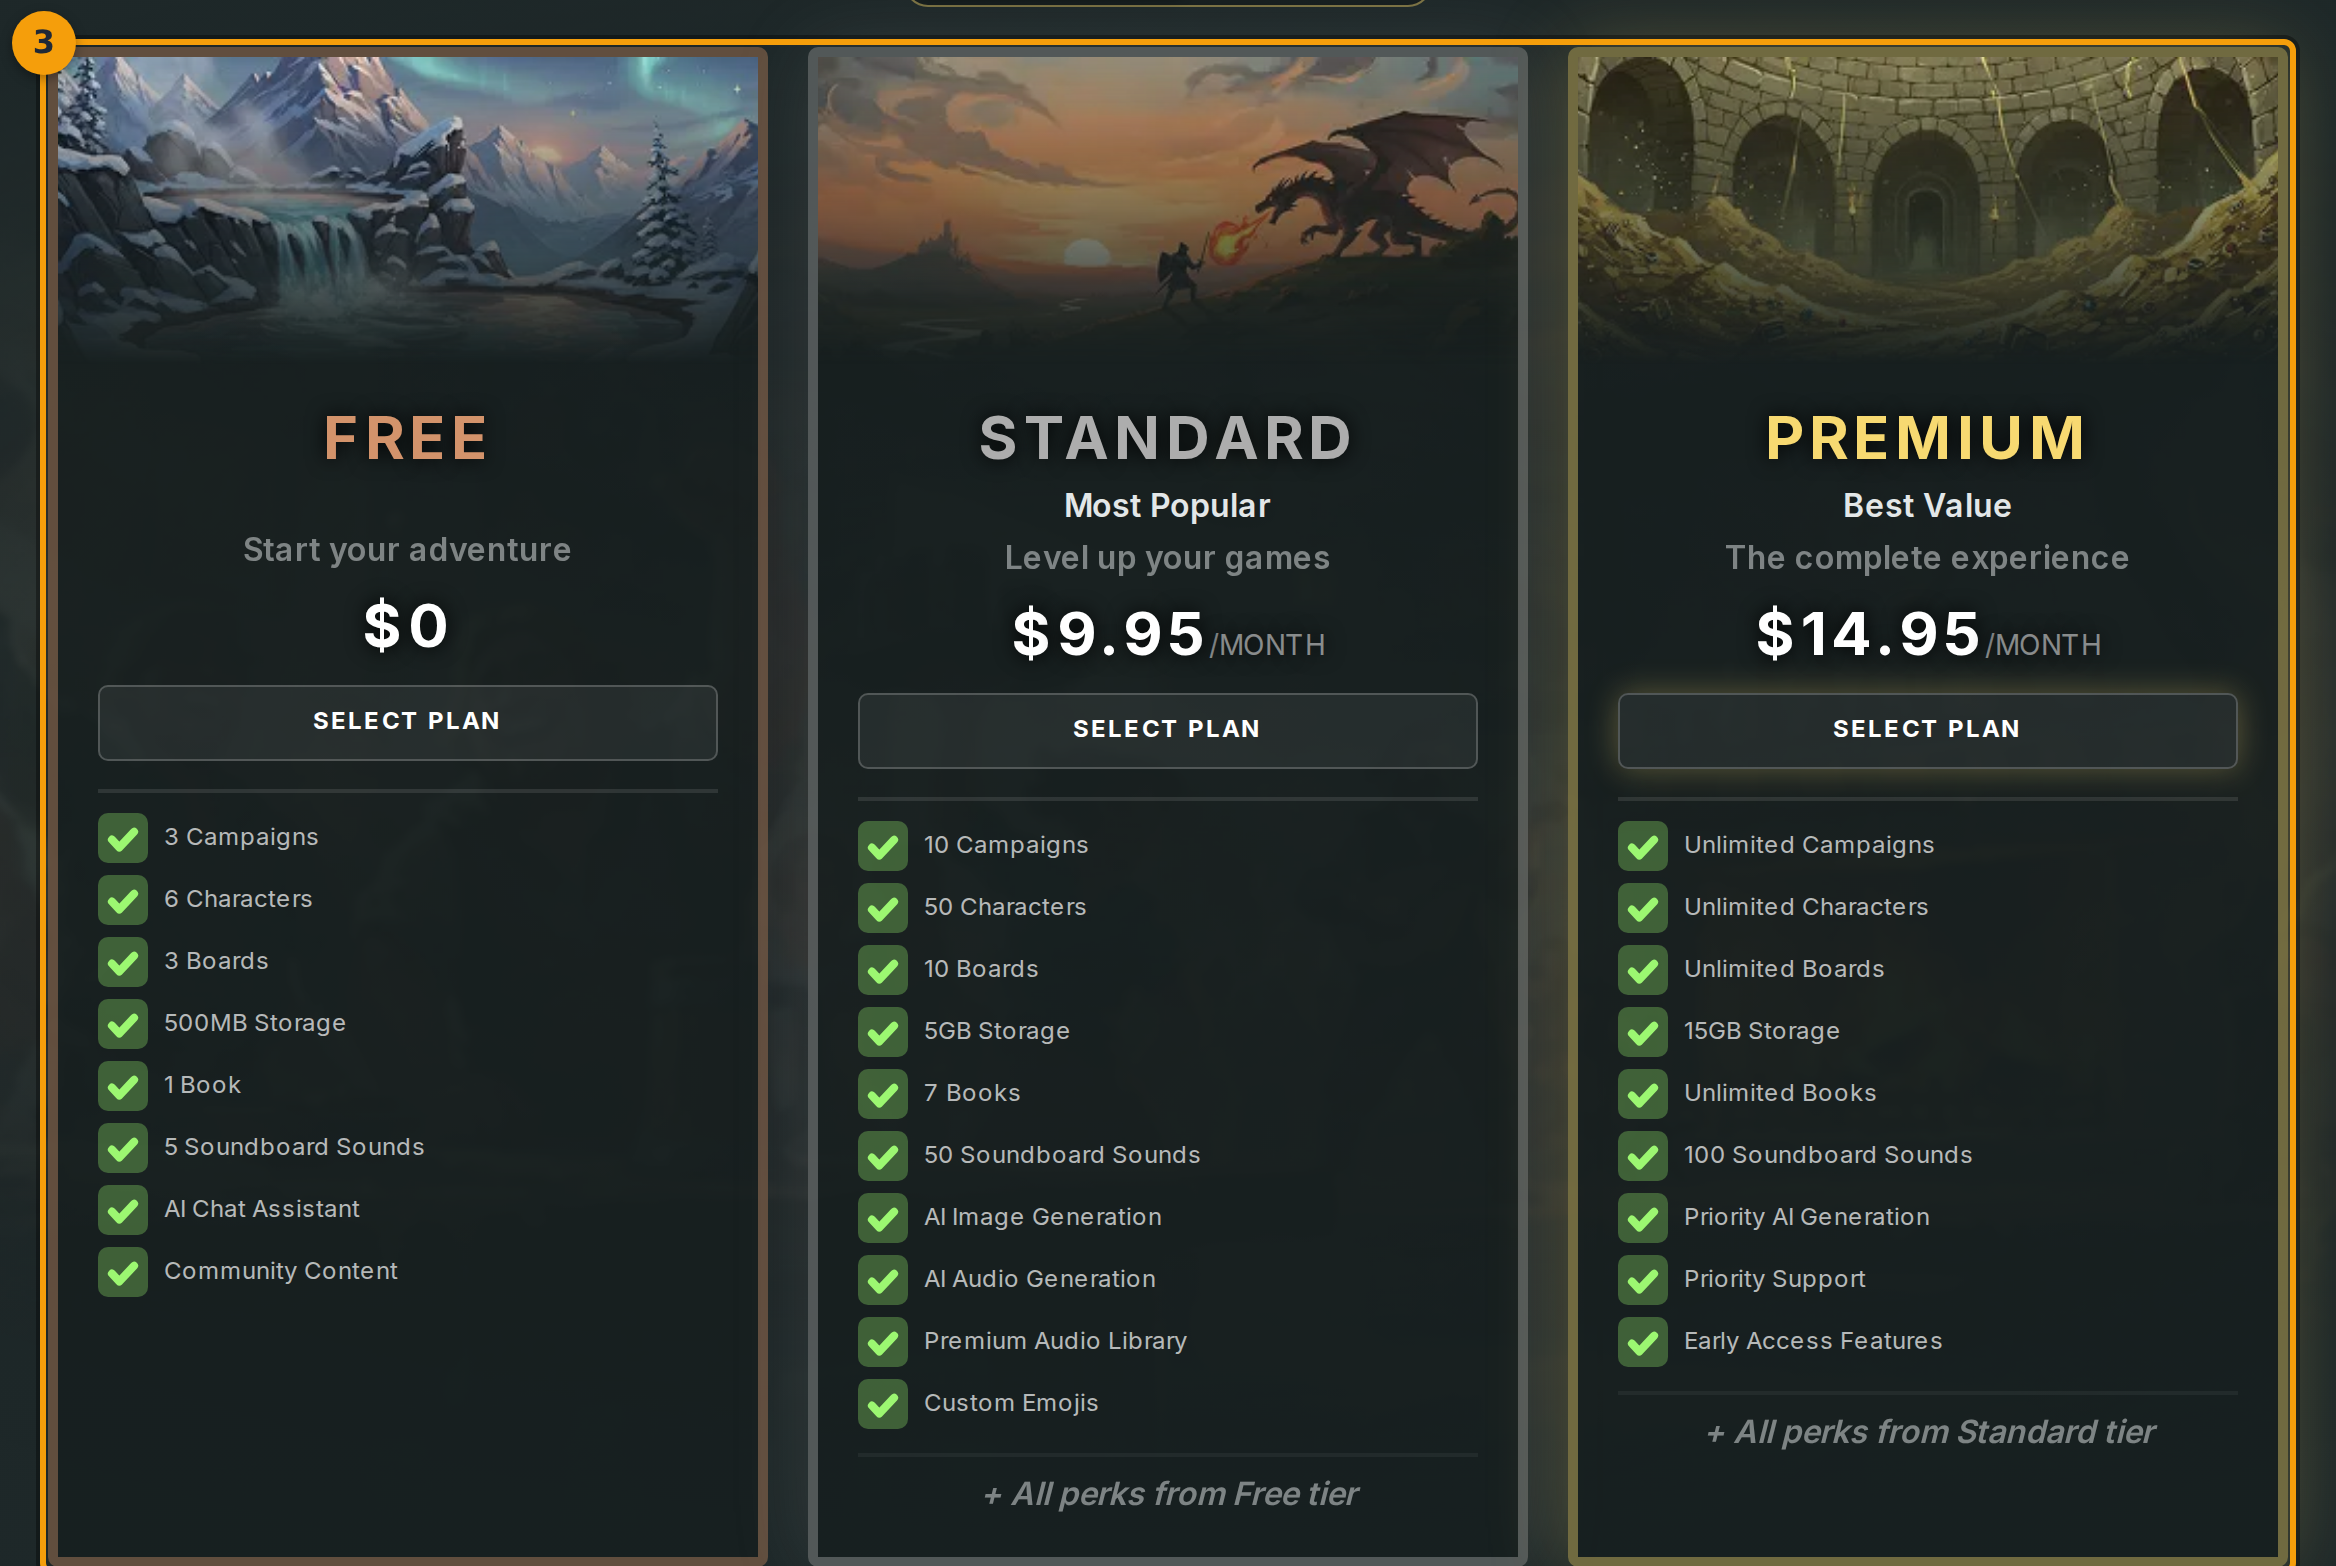
The tier grid (badge 3) shows one card per plan. Each card displays the price line and a short list of headline features.
Two cards carry badges: Most Popular sits on Standard and Best Value sits on Premium.
Your active plan shows a SELECTED badge in place of the SELECT PLAN button. All other cards show SELECT PLAN, which you can click to start a plan change.
Step 4: Use the perks table to compare features across tiers
Scroll down to the Subscription Perks section (badge 4). Each row covers one feature, such as character slots, campaign count, AI energy, framework editor access, and storage.
The three tier columns sit side by side so you can read the trade-off on any single row without switching views.
Once you have identified the tier that matches how you use Fabled, scroll back up to the card grid and click SELECT PLAN on the card for that tier.
